PhotobucketPhotobucketPhotobucketPhotobucketPhotobucketPhotobucket
Showing posts with label bedroom. Show all posts

Saturday, February 11, 2012

Dresser Gets a Face Lift

After spending my entire birthday on airplanes and in airports, I arrived home a week and a half ago with only ten minutes left before the clock would strike midnight and my special day would be over.

Needless to say, I was exhausted and a bit depressed.

However, walking in to see my dining room not only decorated with streamers, presents, flowers and a cake . . . but also completely transformed was a total surprise.  Imani and Jason made the last ten minutes of my day so special and I realized that the best gift was returning home to my family. 

I was completely overwhelmed  when Jason handed me eleven hand-written pages that would become his first blog post (He didn't know the ins and outs of how to actually go on and post it himself . . . but I will teach him so that he can post again).

And he got my birthday wish, so all of you Giants fans can thank me.

His post was an inspiration for me to set aside time this weekend to blog about a project we finished a while ago, but I just hadn't had the time to write about.

Sometime shortly after New Year's, Jason and I finally got around to giving our bedroom furniture a little face lift.

You might remember we've altered one piece before.  Remember last year when Jason cut up a dresser (literally) to make room for a bassinet in our bedroom?!  It's definitely one of the crazier projects we've attempted so if you haven't read it, be sure to check it out here.

I've been wanting to get rid of the dark brown furniture for a long time, but we've been on a mission to save money and attempt to be debt-free (remember last year's resolution?)  We've done an AMAZING job so far, especially given that Jason is now a stay-at-home dad.


I haven't been happy with the color of the dressers and I hate that it all looks so manufactured.  I wanted something that was lighter in color and  looked more antique, more worn . . . but purchasing new (or antique) dressers was out of the question.   By the way, if you like the look of dark furniture that looks new, you should stop reading NOW because I'm about to share how to make this baby look older and worn.

I've already had some people come over to our house and see our finished product and think we've lost our minds.

So

stop

reading


if

you

like

 the

new

"matchy, matchy"

 look.


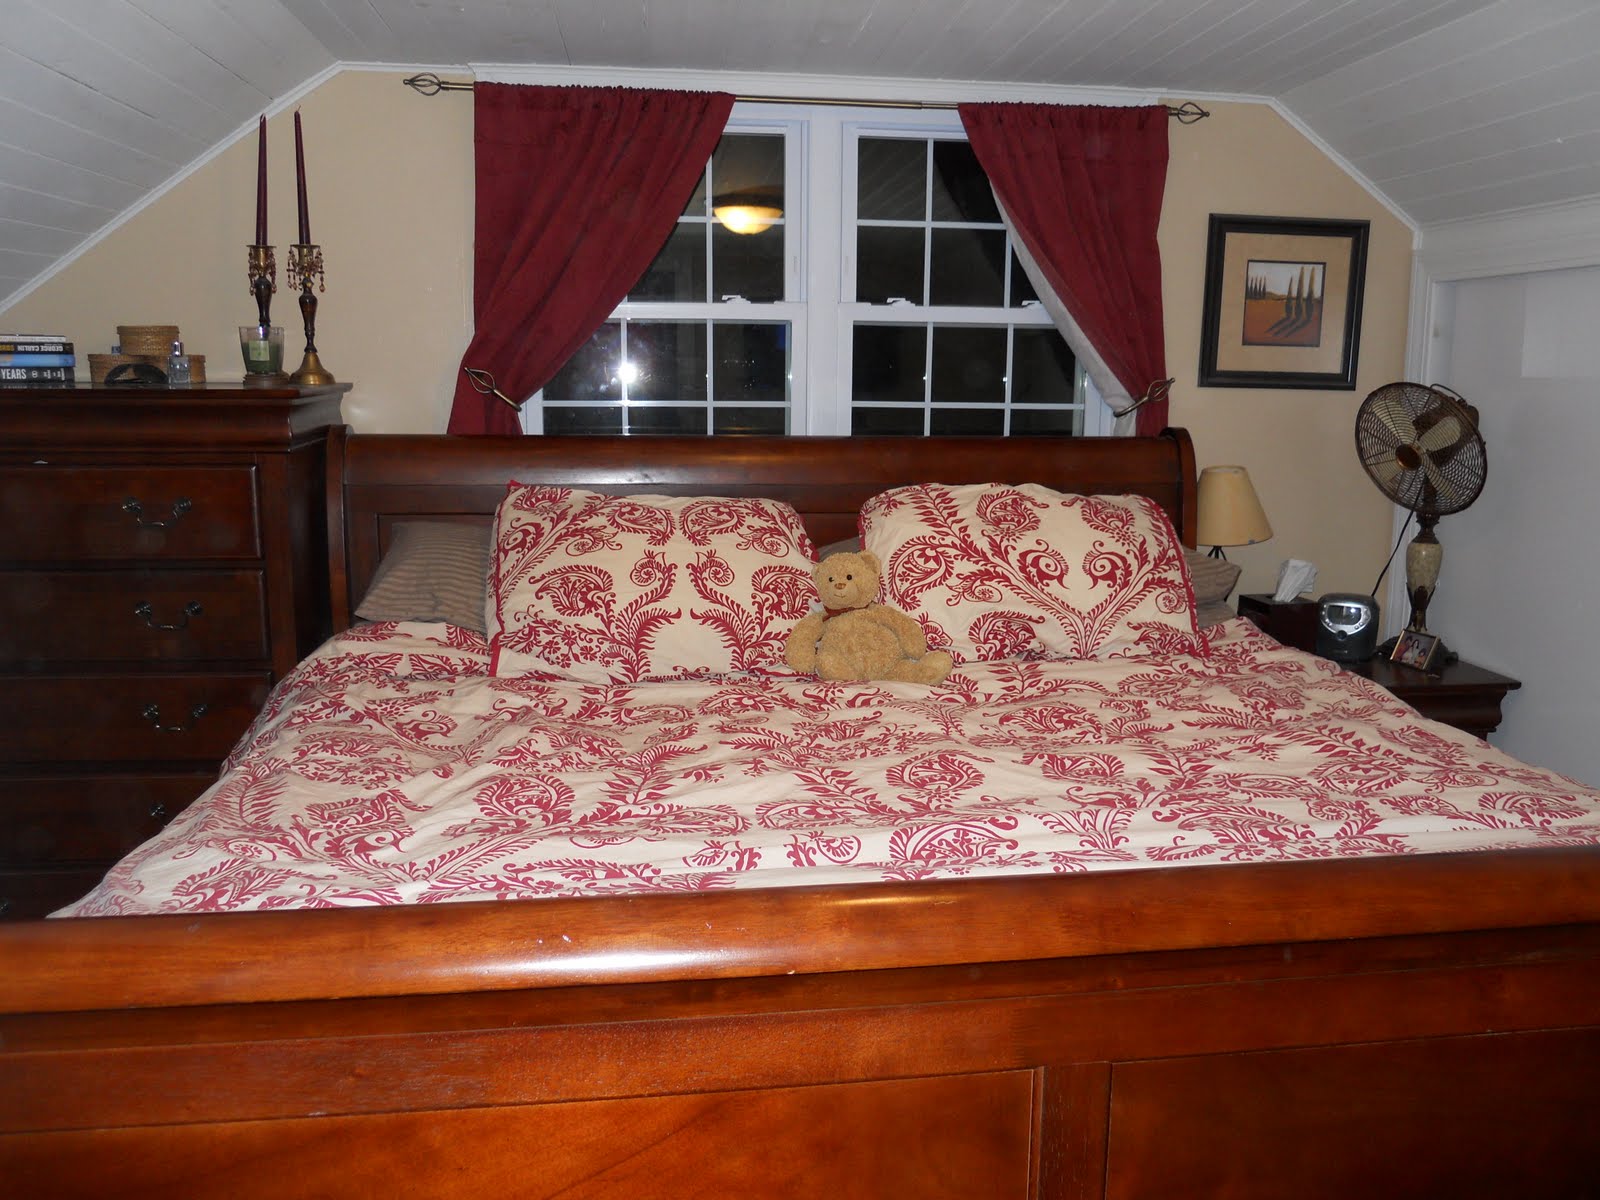
Here is the original dresser, complete with antiqued brass handles.


Many of my followers of this blog suggested Annie Sloan Chalk paint to me and to be honest, I'd never heard of it before. 


After a little research, I discovered that Annie Sloan chalk paint is NOT chalkboard paint -- it's TOTALLY different.

Annie Sloan Chalk paint is like magic.

It requires NO primer.

And it can be used on just about any surface.

It's really magical.

So I found a dealer in Upstate New York -- the Purple Painted Lady, located in Palmyra, NY.  Tricia was super helpful in teaching me how to apply the paint and how to distress the furniture if that was the look we wanted.  If you need to get some Annie Sloan Chalk Paint, check out the Purple Painted Lady online or if you live in Upstate New York, make the drive to the store - it's totally worth it!

I walked out spending roughly $62 with one jar of Paris Grey and one jar of wax.

At first, Jason was skeptical about using a can of paint on manufactured furniture without stripping it, priming it or prepping it in any other way.  He also didn't think the small can that Tricia sold to me would be enough to cover a large dresser and nightstand.

But he'd heard me talk about all I'd read about Annie Sloan Chalk paint online and he decided it was worth a try.

So Jason set off to work on the bedroom furniture (sorry for using the flash -- we were working at night and had a very hard time getting the photos right without the flash . . . a year later and I'm still figuring out my DSL camera)

He applied one coat directly to the nightstand.


It looked almost white when it was first applied, but it darkened up after it dried.  He didn't even need to add a second coat. 

We were amazed that this paint had virtually no smell either (and no, I'm not getting paid for this and I did not receive free paint.  We were just amazed by this paint).  Jason was painting it in our house at night and I was about to open every window in the house for fear of killing my kids from paint fumes, when I realized it didn't really smell (don't worry, Mom; I did open a window for ventilation so your grand kids were fine).

The Annie Sloan website says this paint gives off extremely low VOC's so it's good for the environment too. 

In fact, here are the reason's the paint is so special, according to the Annie Sloan website:

"1. It's the BEST paint for painting furniture by a long way

2. No need to prime or prepare

3.Extremely low VOCs so it is good for the environment

4. You can use it on any surface, indoors and out ( the outside of our shop was painted in it- perfect!)

5. You can use the paint by diluting it with water to make a wash to show the wood grain

6. The colours are mixed intelligently and the web site shows how you can adapt your colours for your use

7. It's a girls' paint, but boys can use it too.

8. It's flexible so you can be creative and change your mind

9. It allows your walls to breathe so it is perfect for cottage walls

10. You can use it as an impasto ( thickly) - leave the lid off to thicken

11. We've been making it since 1990 so it's tried and tested"


After waiting for 24 hours, Jason distressed the dresser using 100 grit sandpaper and then applied a coat of Annie Sloan wax.


After applying the wax, he let it dry for 48 hours and buffed it using an old white t-shirt.
Then, he applied the new hardware I'd purchased at Hobby Lobby (on sale for 50% off).


I'm totally in love with the new look.  


And Jason is now obsessed with Annie Sloan Chalk paint.   He'll never use primer for furniture again.


Maybe I'll buy him a can for Valentine's Day.

:-)


Monday, May 16, 2011

Out with the Mold

Remember when Jason smelled mold in our bedroom and he ripped apart the entire wall to address the problem only a month before I was due to have Noah?  If you missed it, you can read about it here.  For a short time, my bedroom looked like this:


and I was just praying that Noah wouldn't decide to arrive early and this would be his welcome to our home.

Thankfully, he was late like his parents.

Instead of just replacing the insulation, fixing the window and re-sheetrocking the wall, we figured it would be a nice time to change things up a bit. 

Yes, we tend to take on big projects during monumental events in our lives.

Like the time we gutted our entire kitchen only weeks before our wedding.  In fact, I was so sick of doing dishes in the bathroom and cooking outside on the grill that our honeymoon was more than just a honeymoon . . . it was an escape from the chaos of my kitchen.  While we were away, our countertops were installed so that when we returned, Jason could finish up the kitchen.

What can I say?   We love stress.

Anyway . . . back to the story at hand.

I had  been wanting to give our bedroom more of a cottage feel, since it is such a small space.    I really love the horizontal plank walls that I've seen in Pottery Barn, Country Living and over at The Lettered Cottage.


The good news is that I didn't have to sell Jason on the idea. He actually welcomed it, since he hates to tape and spackle sheet rock.


Perhaps you remember our bedroom originally looked like this.


And then we got rid of the king sized bed and I had Jason cut our dresser so that it could be moved to make room for the bassinet.  If you missed that crazy adventure, you can read about it here.

That brought our bedroom to this.


We moved the jewelry armoire and mirror to make room for the beautiful PB bassinet that was a gift from my mother in law and her boyfriend.  Remember the sketch she did of the bassinet because it wasn't going to arrive in time for my shower?  You know, the one that hangs in Noah's room as a piece of art on the wall?


Well the bassinet arrived in time for Noah and it looks great in the space we created.  .


Did you notice the switches up on the wall?  Well, I've always wanted lights on either side of the bed for reading.  I'm not a Kindle kind of girl . . . I like good ol' fashioned pages to turn, which means I need a light so that I can read at night.  And I'm not much into little book lights. They fall off my book, run out of batteries and generally aggravate me.

So my husband who spoils me installed two lights - one on either side of the bed and each light has its own switch.  Once Noah was born, Jason took the lights one step further and installed a dimmer switch so that we could get up to tend to Noah in the middle of the night without flipping on a bright light.


It all came together really nicely and I'm growing to really love my slanted ceilings and small bedroom. I never thought I would, but it's become my little cozy haven.


We both hated the color of the walls so we figured that while we were installing the plank wall, we might as well update the color too.  We used white on the planked wall and went with Sherwin William's "Blue Hubbard" for the side walls (a color I'll admit I snagged from The Lettered Cottage's design).


We I still have a few things we'd I'd like to do in this room. As you know from reading my blog, I hate the color of the dressers and night stand. I'd like to try to refinish them in a lighter color. Originally, I wanted to paint them white, but now I'm hoping to go with a distressed gray like much of the furniture in Restoration Hardware.

I also want to get a new light fixture.  I'd love a chandelier, but our ceilings are so low, I don't think it would look right.  I've been looking around but haven't found anything that speaks to me yet.  Any suggestions?

Finally, I want to get rid of the towering fan on the night stand and update it with a smaller, silver more industrial looking fan.  Getting rid of the fan is not an option, as you might remember from my post Finding Sleep with a Fan.   While the current fan we have is a huge upgrade from the old boxed fan we used to  use, it looks Victorian, and just doesn't go with the room anymore.

I also want to ditch the old-school electric alarm clock.  You know how much I hate the look of electronics so I want to hide our alarm clock somehow.  I thought of using a classic looking alarm clock (you know the ones that have a little device that hits two bells at the top?)  but Jason says he doesn't want to wake up to such a loud alarm in the morning.  I've also considered just using our cell phones as alarm clocks, but J likes to see the time in the middle of the night so maybe a cell phone docking station would work? 
I'm still figuring it out.

So there you have it . . . our lighter, brighter and mold-free bedroom.


Linking to:


Thursday, February 24, 2011

Sidetracked by Mold

For the past month, every time Jason and I go to bed, he sneezes uncontrollably.

 I was convinced he was allergic to Maggie, since she sleeps in bed with us.

Maybe I thought it would just  help my argument to get her out of the bed before the baby arrives,
but no luck.


A couple of weekends ago, my sister and her friend Lauren visited because my sister was throwing a baby shower for me.  Lauren was sleeping in our sitting room downstairs, just below our bedroom.  She commented that she had to move into our family room because the sneezing was keeping her awake.

It was THAT bad.

I started thinking maybe we had down throw pillows on our bed, since Jason is allergic to feathers, but that wasn't it either.


Jason insisted he smelled a mold every time he went to bed.

But I didn't smell it and I insisted again that Maggie be moved out of the bed.

But she remained . . . and the sneezing continued.


Friday was a beautiful day. It was unseasonably warm and sunny -- a welcome break from all of the cold and snow we've had this winter.


I was exhausted so I turned into bed especially early Friday night.  And the warmth of the day made the stench that much more noticeable.  When I climbed into bed, I smelled it.

Jason wasn't crazy after all.

The moldy smell was seeping out from our bedroom wall above our bed.

I called Jason upstairs immediately.  I couldn't sleep in that room, so I move into Imani's room for a little sleepover (and of course, she was thrilled!)

There was only one way to fix the problem . . . and even though Saturday, we had big plans to address the nursery closet, Jason spent Saturday night tearing down the sheetrock behind our bed.


All of the insulation was damp so it all got bagged up and removed from the house.  


Apparently, when we had our windows replaced last year, the company that installed the window didn't seal it properly, so Jason went back through and re-caulked the whole window and then sprayed it with spray foam to prevent future leaks.  

The foam was huge and bulging out of the cracks when it dried so Jason had to cut it.


Imani and I had another sleepover in her room and I think she secretly hoped the wall would never get fixed.


Of course I figured that while the wall is ripped apart, we might as well make a few changes to it. You'll have to wait and see what we come up with.


We spent a good chunk of our Sunday afternoon wandering around Lowes buying everything we'd need to replace the wall, along with materials to address the baby's closet . . . if we ever get to it. 

I almost fell over when I saw the grand total at checkout.

This wasn't in the budget, but it's a good thing the Coupon Cowboy has been saving us so much money week after week.


I'm happy to report that although the wall isn't finished, I am back to sleeping in my own bed, much to Imani's disappointment.

AND  I'm getting a full night's sleep, since my husband isn't up sneezing all night!! :-)


And Maggie remains comfortable in bed with us, despite my desire to kick her out before the baby arrives.


Monday, February 7, 2011

Hacking up a Dresser

So most of you know that we were going to sell our house in preparation for expanding our family.

We just didn't think this house was big enough.

But after a failed home inspection and a feeling of sadness of leaving this little Cape, we decided to stay put.

We thought it would take a while to get pregnant and maybe we could put an addition on the house, but nope!  We were pregnant within one weekend . . .

Some things are just mean to be, I guess :-)

So now we are faced with the dilemma of a lack of space and I keep reminding myself that people have more children in homes much smaller than ours and they manage just fine.

But the space issue keeps nagging at me. It keeps me awake at night.

Take our bedroom for instance.   With its typical Cape Cod-Style slanty ceilings, we are limited with where we can place furniture,  because it hits the ceiling in some areas.

So I recently showed you our bedroom, which looked like this:


You can't see it that well, but there is a large dresser to the left of our bed.  Here is the old photo with our giant king-sized bed that was waaaaaaay too big for our little bedroom.


YIKES . . . that picture scares me on so many levels.  Don't the candlesticks look like they will catch the ceiling on fire?  Fortunately, those were never lit and they have long been donated to the Salvation Army.

The dresser is placed to the left of our bed because it is the ONLY place it will fit in our bedroom.  If we placed it on the right side, it would block our closets.  Anywhere else it would hit the slanty ceilings.


The problem is, this is the exact spot where I plan to put the baby's bassinet.  Here is the one we've been eyeing at Pottery Barn.

Image: Pottery Barn
I love that it has a removable moses basket that can easily be brought downstairs for naps, and I love the storage area underneath.  I'm all about the storage from living in a house with very little closet space.
What's even better is that it has this adorable bedding that hides the storage underneath
(Ours would be white with blue bows. . . )

Anyway, my dilemma is that if I place the bassinet next to the bed, it would block Jason's dresser.

So I was tossing and turning in bed one night worrying about it, when I had a genius idea!   I woke Jason up to tell him about it.

"J . . . I figured it out.  You could cut the dresser to remove one of the drawers and shorten the dresser so it would fit in the little nook on the other side of the bedroom!"

Here is the area where I envisioned moving the dresser.


But Jason was having none of it.


Jason:  "Stephenie go to sleep. You're crazy.  We're NOT cutting the dresser."

Silence.


I can't believe this man still doubts me.  When he does, I only become more adamant and I find myself becoming more and more confident that my idea will work.

Can you believe it . . . this past Saturday night, we found ourselves hacking up the dresser,
hoping the idea would work.


First, Jason removed all of the drawers and took a look up underneath to see how the top of the dresser was secured.  He was happy to find that the top was screwed on to wooden supports.


So he began to unscrew the top from the supports and we labeled everything so we could reassemble it later.


The top came off easily.


But the moulding was a bit more of a challenge because it had been glued on so out came the ole' chisel.


And here is when the Coupon Cowboy started doubting the project and telling me that perhaps we should just throw the dresser away and buy a new one.  (I think he forgot our New Year's Resolution).

But he continued chiseling and eventually, the moulding came off.


We were left with a dresser that looked like this.


Next, we figured out where the moulding would need to be placed once we cut off the top drawer and measured down.  It was about 8 inches, so we marked accordingly all the way around the dresser.


And then the cutting began. 


Jason had to be careful not to cut unevenly or he would have a slanty dresser that would
match our slanty ceilings.


The dresser started looking like this.


Once it was cut all the way around, the reassembly began.  Jason swears by this stuff:


Apparently, it's about as strong as cement.

So my Mr. Dream-Maker took that gun of cementy goodness and applied it all around to reattach the moulding and the top of the dresser.


This stuff is so messy and sticky, you have to use gasoline to remove it from your skin. No joke.


Next, the supports were screwed back on (and stapled).


Once the moulding was reattached, it looked like this.


Finally, the top was screwed back on.
Here's what was left over from all of our hacking
(and one drawer, which I'm not sure what we're going to do with yet)


Jason was so happy that the top was actually level!


And I was thrilled that it actually fit into the little nook perfectly and that I'd get to go to bed . . . since we finished cleaning up around 3 AM!
 
Can you believe it?  We have ourselves a nice short dresser.


My poor husband did lose a drawer, so I offered up one of mine from my dresser, but he declined.


Here is the space now. We moved the mirror and jewelry armoire there, but that will be moved once we get the bassinet. I just didn't want a big empty space.


We're both loving the space that was created from this project.

Next up:  REFINISHING the furniture to something lighter and changing the hardware. 

Stay tuned and wish us luck!


Linking up with:

handmade projects


Today's Creative Blog

The Girl Creative


The DIY Show Off


Join  us Saturdays at tatertotsandjello.com for the weekend wrap 
 up           party!

The Lettered Cottage
Related Posts with Thumbnails